
New Server Project
Well my New Years resolution was to do something positive and useful for society in general and my little corner of the world in particular. So I had a look at a few charities and sent off a few emails and then sat round waiting for inspiration. Nothing happened, so I thought I would amuse myself with a project of my own making.My Poweredge 2650
After a spot of pondering on what to do I went and bought an Ebay Special, in the form of a Poweredge 2650 rack mounted server from which to launch this new venture. The PE 2650 server was born in 2003 but had been very sad and lonely being sat on a shelf in a warehouse waiting to be used, so basically the thing is brand spanking new and waiting to do something useful. The server even came with some discs and Micro$haft licences, needless to say they went straight in the bin. Now I have never set up a rack server before so thought this would be an interesting diversion, particularly as it might help someone else out of a spot if I record my progress online.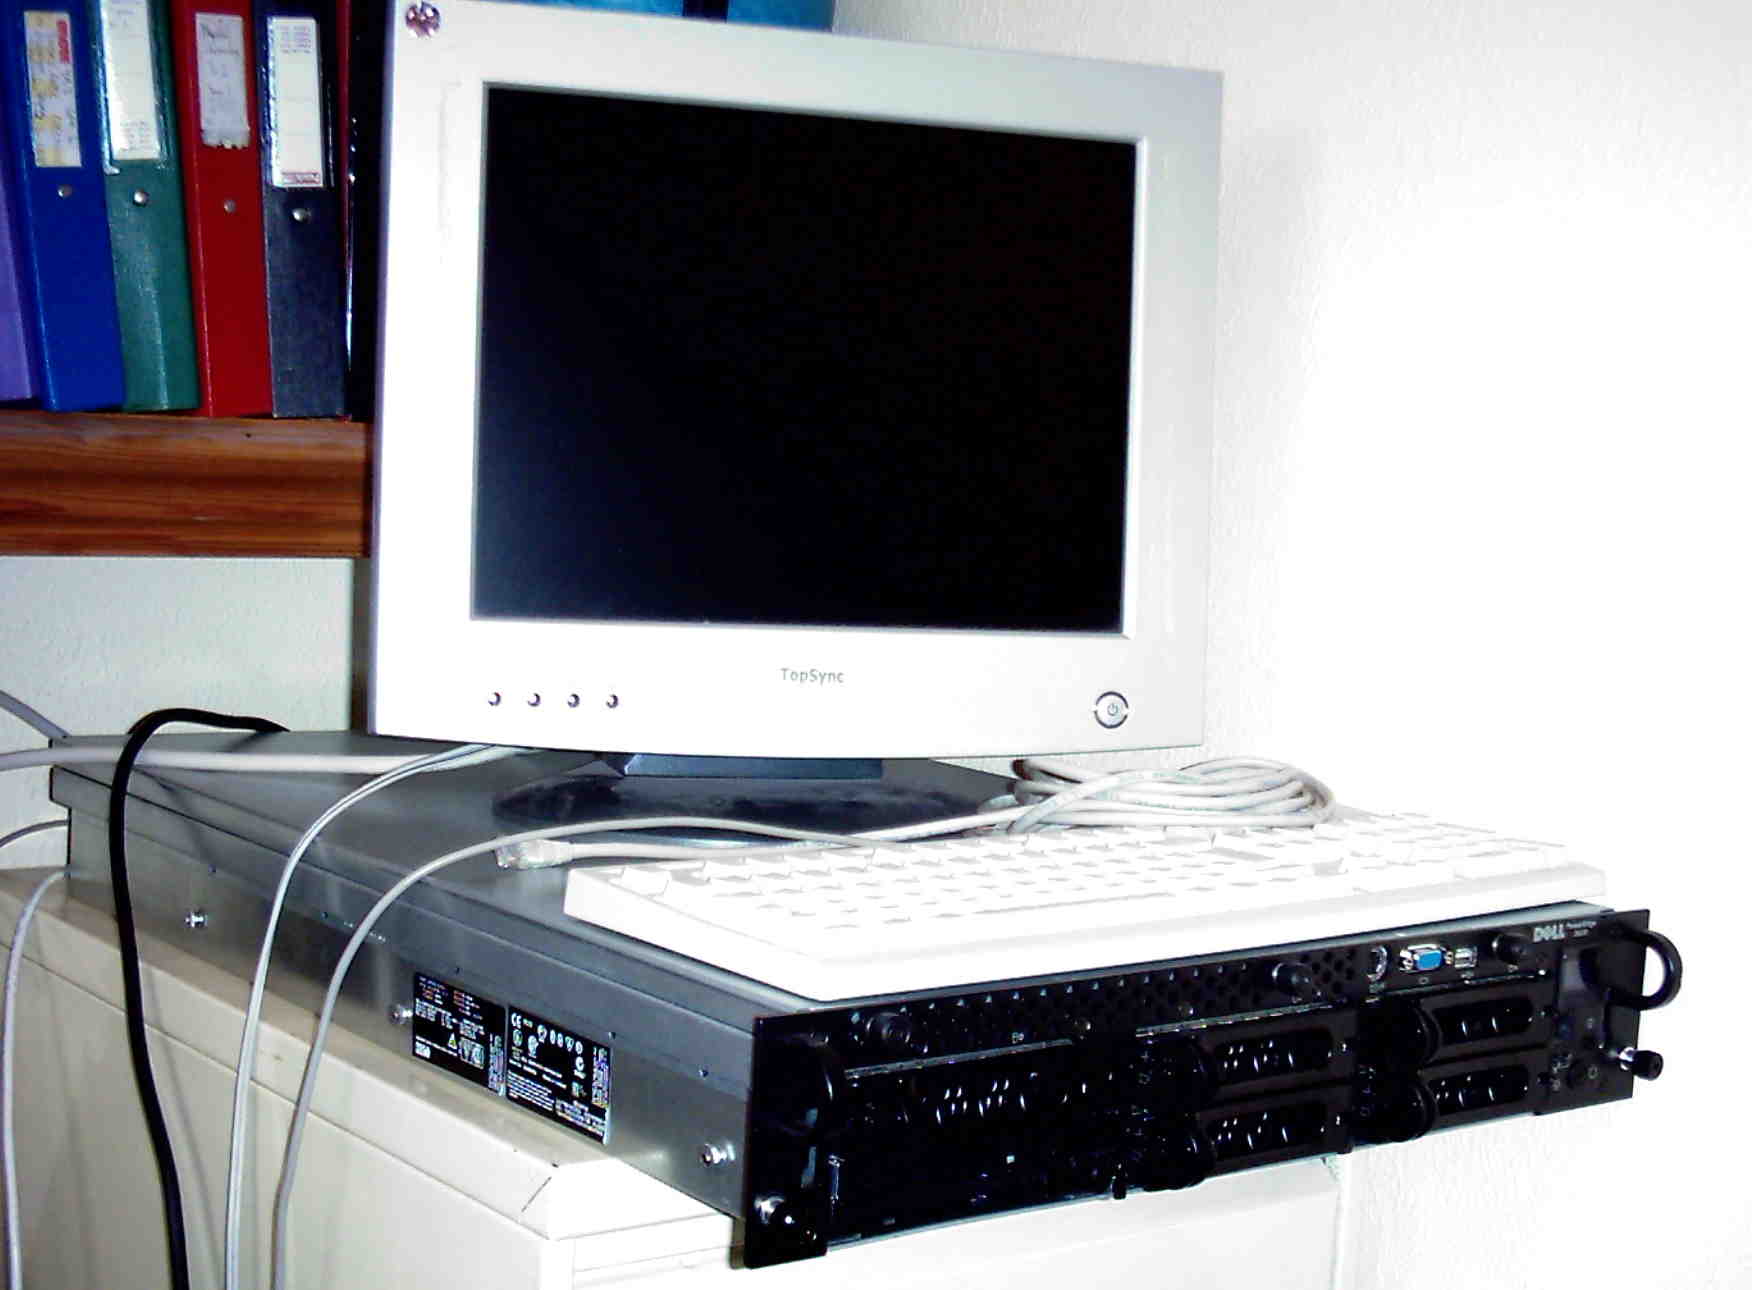 |
| My 2650 plugged in and ready to go |
Setting up a webserver
I have run a couple of webservers before but these were just ordinary desktop type PC's that I had shoved a Linux distribution onto so that I could host some simple web pages for my day job.First Steps: Upgrading the firmware
One of the first jobs to do with any server especially if it is a rather old one is to make sure that the firmware is up to date. This is especially important if you want the server to be as reliable as possible and to make sure your Linux install goes smoothly.Updated bios to A21 (BR168380.exe) and the Perc3/QC firmware
Updated the RAID PERC Firmware to version 2.8 via Dell update via http://support.dell.com
Now the PE 2650 rack server has 5 hard drives, a DVD drive and a floppy drive. The first question I had to ask myself was why all those hard drives? Obviously this is to make my data more secure, but how on earth does it do this? Well after a bit of research, the best place to find help on this issue was Youtube. Some very helpful chap had done a most informitive presentation on a quick overview of RAID.
Preparing the hardware and RAID5
Basically there are several ways that you can keep your data secure or at least more secure than if it was stored on one drive alone and that is to use RAID which stands for Redundant Array of Inexpensive disks. The Poweredge 2650 makes use of RAID 5 which stores your data in stripes across all the drives that are configured to use it. The only disadvantage is that you lose the storage capacity of one of your disks, but the advantage is that your operating system sees one large hard drive not 5 separate hard drives and because this type of server supports hot plug drives if one of the drives fails then you simply pull it out and stuff in a new drive and the system restores the data and shoves it back on this new drive.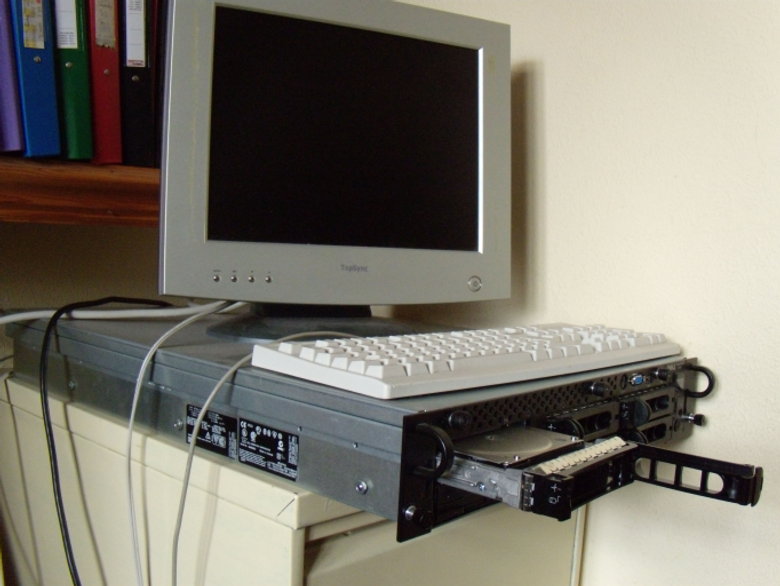 |
| The drives fit neatly into the front of the server for easy aceess. |
Setting Up RAID 5
Again after a quick search of Youtube I came across another useful video that explained how to set up RAID 5 using the exact same server as myself. So if you too have a PE 2650 then have a look at Setting up RAID 5 on a PE2650, a most informative video. However if you dont have access to Youtube and you want to know how to set up RAID 5 then here is the text description.Hold down F10 at BootUP
Then hold down Ctrl + A to access the RAID firmware. A blue screen should appear with thre different menu options on it.
Select Container Configuration Utility and hit the Enter key, another menu will appear from which you should select Initialise drives. Use the Insert key to select all the drives and hit Enter when done. An on screen warning pops up saying it will erase all info on the drives, press Y to accept this and the drives will initialise.
Now select Create Container from the menu options and hit Enter. Select all the drives by hitting the Insert key followed by Enter. When the Container properties box comes up select RAID 5 from the container type, and call the container name anything you like eg Container 1. For the rest of this screens menu options just accept the defaults by hitting Enter until you reach Done.
Finally go to Manage Container menu option and hit Enter. Look at the Container Status and when the Scrub reaches 100% you are done setting up RAID 5.
You are now ready to install your Linux operating system. Why choose Linux and not Micro$haft? Well I and most of the Chinese, East European and Brazilian I.T students I have come across can get into any Micro$haft system faster than a scabby rat up a drainpipe and whilst I have no objection to any of these people having space on my server I like to be asked first, its only polite!
Installing Ubuntu Linux
I have been quite conservative in my trial of Linux operating systems, really and truthfully having only gone in depth with Suse and Ubuntu, the first being Suse as it was one of the first distributions that would run on a Powermac. However after a bit of dabbling into Auditor and Knoppix which are both good distributions for very different reasons, my current favourite is Ubuntu, mainly as it keeps itself up to date without too much hassle and is very easy to configure.I tried to install the latest server version of Ubuntu which is 8.10, however although it seemed to install perfectly I couldnt get the 2650 to boot. It knew there was an operating system there but would not go the whole hog and boot! I suspect it may be a grub bootloader problem. However I have now installed Ubuntu 8.04 and am ready to start doing updates and installing some extra bits and pieces.
Visit to the Data Centre
Had a day out today and visited a small data centre where I was hoping to house the 2650, the main reason for this being that the thing sounds like a jet fighter taking off when its powered up. The only drawback is the price. As my server is a 2U unit the data centre want me to put it on a shelf and for that they will charge me for an extra U. So 3U of space at £15 per U per month is £45, and on top of that they want to charge me £2.50 per Gb of data transfer. Sounds a bit steep to me as this venture is only a bit of fun and £45 can buy several beers each month which is more fun than 3U of rackspace.Talking to my server remotely
While I am still sorting out where to house my PE2650 I thought I would see if I could talk to it remotely from my ubuntu desktop machine.The process for this is fairly straightforward, simply open a shell terminal and then type the rather handy command:
ssh username@192.168.0.100
You must however replace "username" with whatever you have called yourself on the Ubuntu system and "192.168.0.100" with the ip address of your server.I can do pretty much anything remotely to my server, by remotely I mean when I am not sat in the same room as the thing, but connected either by a Local Area Network (LAN) or via the Internet.
My
first little task is to make a directory for each of my users to house
their web pages, I am going to call this directory www. In a
Ubuntu linux system all default files for a new user are copied from
the directory "/etc/skel".
cd /etc/skel
The cd command simply means change directoryI now make a directory named www which would be suitable for a users web page files using the command mkdir, however because this is a Ubuntu system I have to tell it I am wishing to perform a root user command so I have to put "sudo" before the command, the server will ask me for a username and password before I can perform a root user command:
sudo mkdir www
Then make sure it has worked by getting a file listing by typing in
ls
which should give something like the output below, this shows the directory /etc/skel contains two directories, one called "Examples" and one called "www".
Examples www
Finally end the session by doing the command
exit
Installing Webmin
Well I thought I would have a go at installing Webmin onto my system. Webmin will allow me to configure my server using a very handy web based interface, this can be a lot easier than trying to remember command line codes like the ones I used to create my www directory.I will update this page once I have got the Webmin installed.
Really Installing Webmin
After a bit of googling I discovered this rather good site that explains how to install a LAMP server with lots of screen shots and diagrams, however here is the relevant Webmin bit which does work.
First you need to install the following packages
sudo apt-get install perl libnet-ssleay-perl openssl libauthen-pam-perl libpam-runtime libio-pty-perl libmd5-perl
Now download the latest webmin using the following command
wget http://prdownloads.sourceforge.net/webadmin/webmin_1.420_all.deb
Now we have webmin_1.420_all.deb package install this package using the following command
sudo dpkg -i webmin_1.420_all.deb
This will complete the installation.
Communicating with Webmin
Unfortunately the day job has been getting in the way of the webserver project. I still haven't found anywhere to put the 2650 that is reasonably priced, so am pondering upon sharing costs of the project with anybody who fancies sharing a bit of server space and the costs that entails.
Start by logging onto webmin. Open your web browser and type in the following to the address bar,
https://192.168.0.100:10000
just replace the "192.168.0.100" by the ip address of your web server. You will then be prompted for the username and password for your webserver. Enter these and with luck your webmin interface should open as shown below.
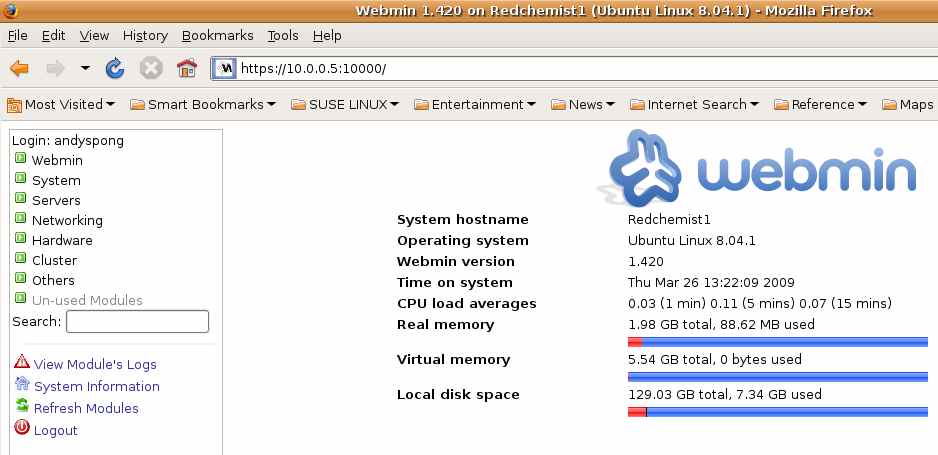 |
| The webmin screen at first login |
Updating the Installed System via Webmin
One of the most important jobs on any server is to keep the packages up to date. This has to be done for security reasons so you don't increase your vulnerability to attack from loopholes that have been found.So we will start by updating all the installed packages to the latest versions using our newqly installed Webmin.
Updating all software packages via Webmin.
To update packages stored on the server click on the “System” tag and then the “Software Packages” tag.A Software Packages Window will open. Simply click the correct radio buttons under the “Upgrade all packages” heading and then hit the “Upgrade Now” button. If everything goes to plan everything will look similar to what you would get if you typed "sudo apt-get update" into the terminal. You will see the progress of the update in the terminal window followed by a very neat description of all the packages that have been updated.
Upgrading Webmin
Whilst we are in an upgrading mood it is also a good idea to upgrade your Webmin to the latest version, So click on the “Webmin” tab, followed by the “Webmin Configuration” tab. Now choose the “Upgrade Webmin” button (Its a big arrow Icon) and an Upgrade Webmin window will open. Now click the “Upgrade Webmin” button to complete the procedure.Stopping services
One of my Linux buddies pointed out that the fewer services I have running on the server the less the likelihood of some kind soul infiltrating my defences. So he suggested that I stop webmin and only start it again when I wish to perform more system administration tasks. To start and stop Webmin from the command line do the following; Log in to the server by opening a terminal and typing:ssh username@your_server_ip_address
sudo /etc/webmin/stop
Starting Webmin is just the same but use the command:sudo /etc/webmin/start
Linux for the Visually Impaired
Have a look at this excellent open source project.
Vinux runs inside, beside, or in place of Windows.
Vinux is accessible from startup to shutdown and offers a wide variety of accessibility tools including 3 screen readers and a magnifier.
Vinux is Linux done right, so try it TODAY! http://vinuxproject.org/
Program with a raspberry
At long last someone has recognised that there is more to ICT than Office apps.